
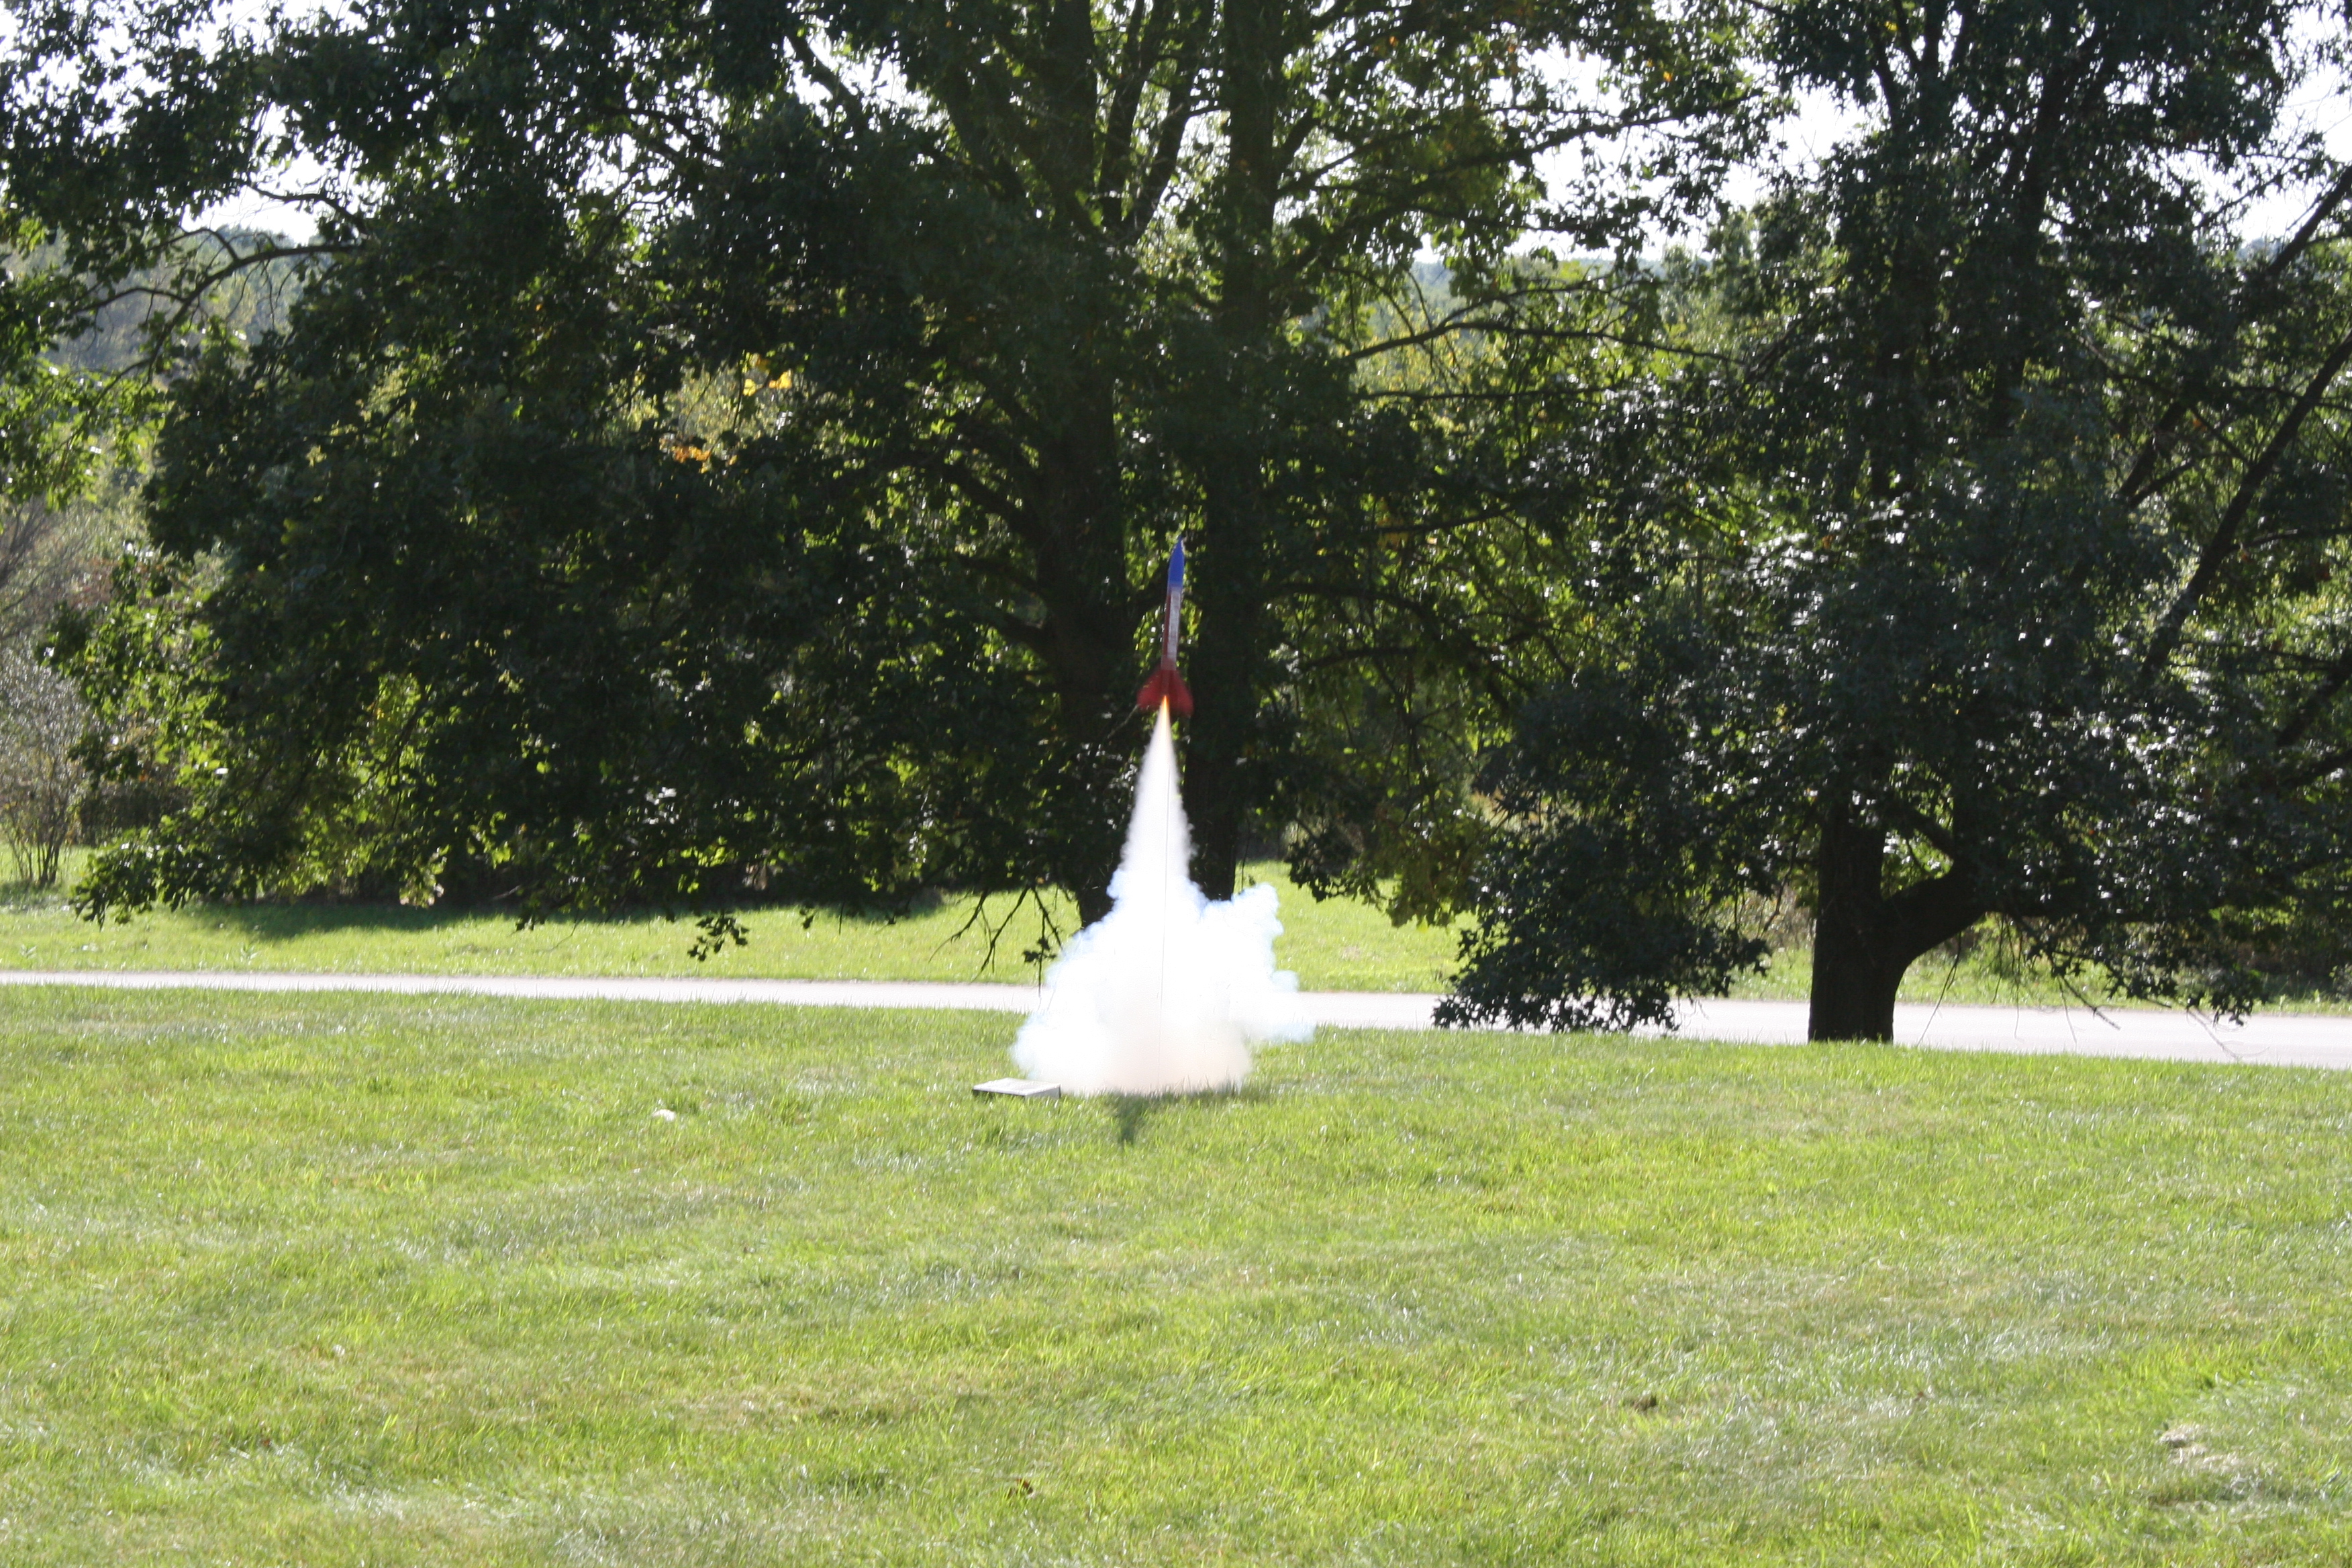
3… 2… 1… Blast off!
Space has often been referred to as the final frontier, and many who look towards the heavens find themselves wondering what might be hiding just beyond our reach. Although commercial space missions cost well into the millions and even billions of dollars, model rocket enthusiasts have been striving to reach just a bit closer to space for decades. Estes model rockets have allowed generations of kids to dream about one day escaping the earth’s gravity and venturing into the unknown. I like to think that a bit of exploratory spirit can be found in everyone, and I am certainly no exception.
 We all know that when you have a hammer, everything starts to look like a nail, and the same is true of 3D printers. When we first acquired a 3D printer, our first thought was: “why don’t we print a rocket?” And here we are. Since anyone can buy off-the-shelf components and put a rocket into the air, we opted for a slightly more challenging approach by attempting to make every component of the rocket ourselves – including engines, igniters, and launch system. This post details our progress so far – after a handful of launch attempts we have successfully made every component except the engines (we’ve been using Estes model rocket engines until we can create a suitable replacement).
CAD Drawings
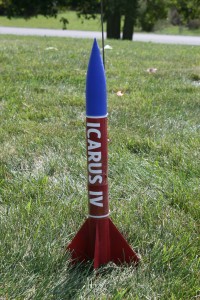
The rocket body consists of several modular pieces that were designed to be somewhat configurable and interchangeable. The tail piece has 4 identical fins that slide into place using a friction fit, and an engine stop that slides inside (which can be adjusted based on the type of engine). The body pieces then lock into place on top of the tail assembly. The number of body pieces used determines the height of the rocket, and guide rings for the launch pad can be fitted on to keep the rocket going straight. A flame shield (a replacement for the normal recovery wadding) slides down into the body to protect the parachute from the ejection charge. And finally the nose cone goes on top.

Rocket Body
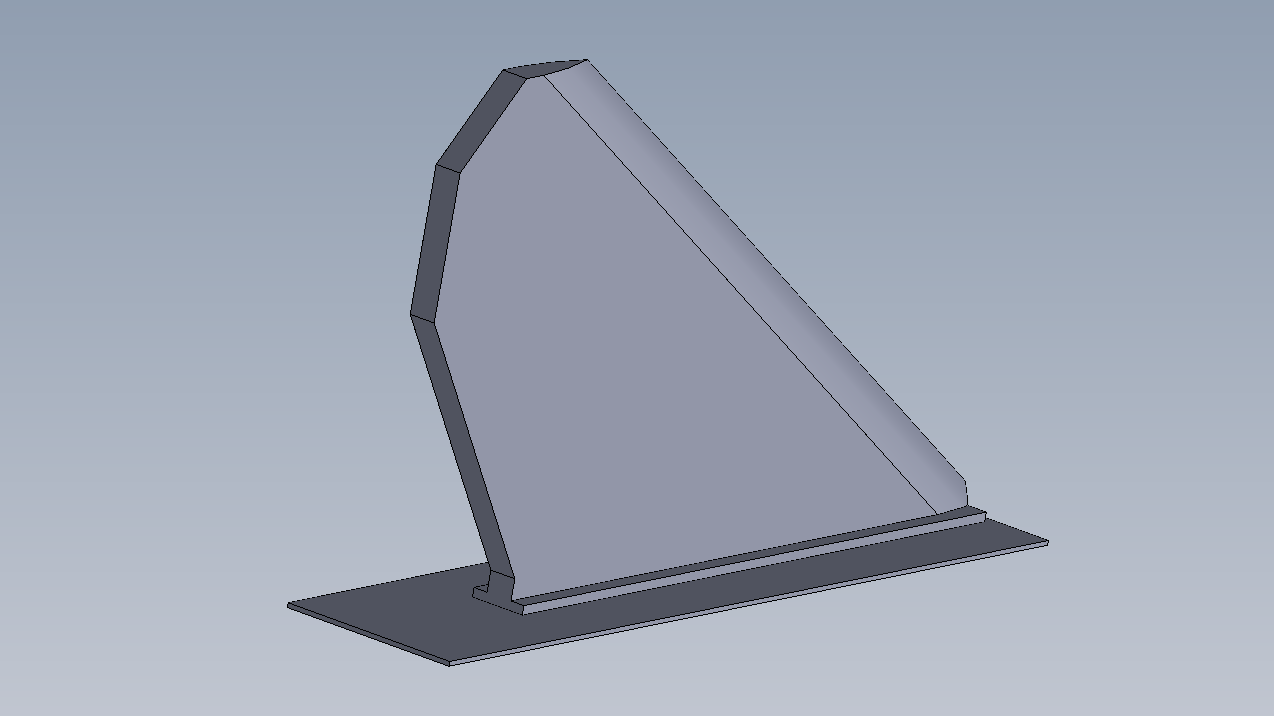
Rocket Fin

Rocket Nose
CAD files for printing the rocket are available in the Profusion repo. All CAD work by Bryan Den Hollander.
Wireless Launch System
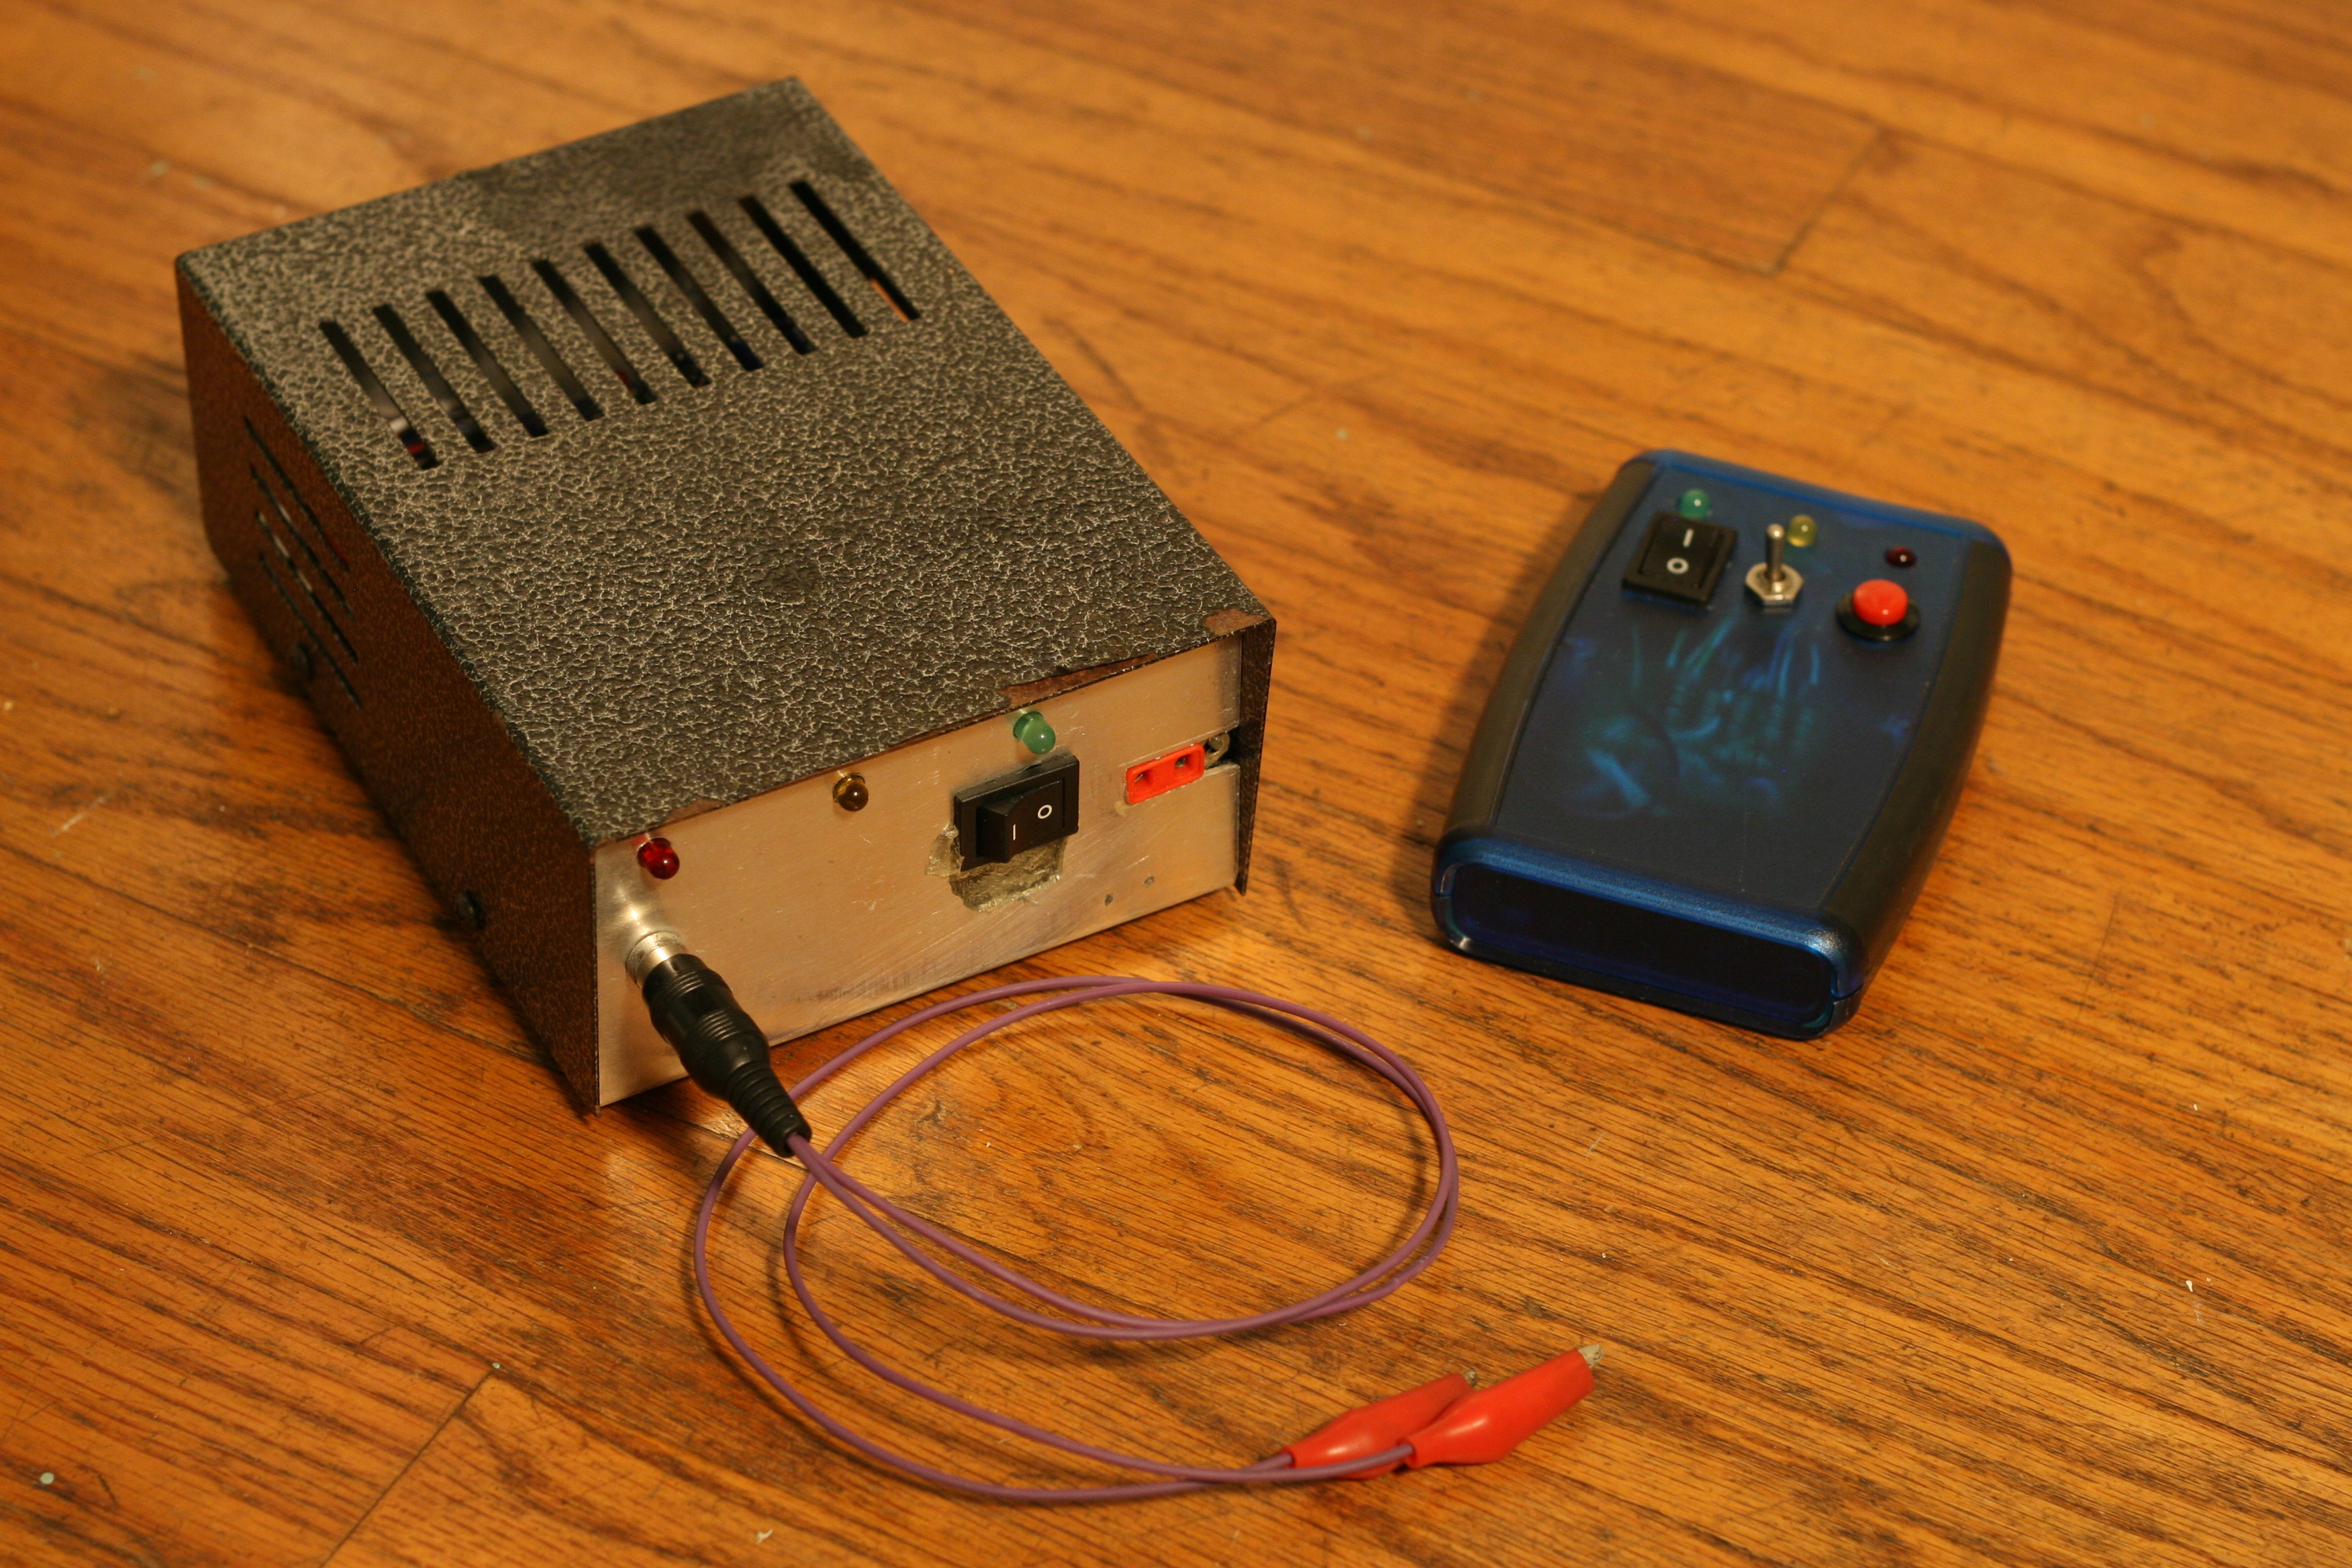
Wireless Remote Launch System
In keeping with the DIY theme we wanted to avoid buying an off-the-shelf launch system, so we started off using a 12V battery and some long wires, shorting the igniter across the battery to activate it. This quickly became cumbersome, mainly due to the limiting length of the lead wires, so we decided to build a wireless system. Some unused Xbees we had laying around became the obvious choice for a quick and easy wireless link, and the rest of the design choices were similarly dictated by parts on hand.
Remote
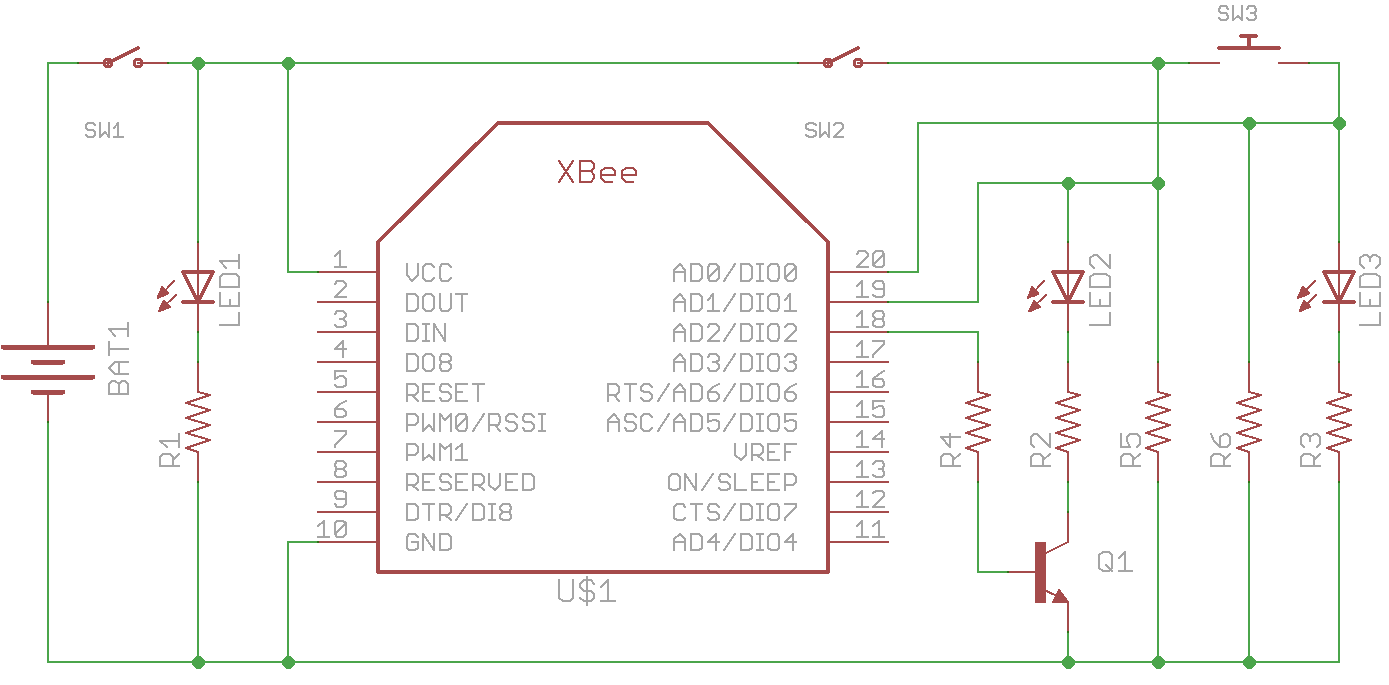
Launch System Remote Schematic
The remote is a handheld device powered by a single lithium primary cell (3.6V, 2400mAh) and contains nothing more than an Xbee, a few buttons and switches, and their corresponding LEDs. The power switch turns on the Xbee, and the arm switch communicates an armed status to the base and allows the fire button to be triggered. The arm and trigger inputs are sent to the base station using the Xbee’s built-in line passing, which essentially mirrors I/O state on two or more Xbee modules. To verify communication with the base when arming, the arm input is sent to the base and then relayed back to the remote. The circuit is detailed in the schematic above.
Base
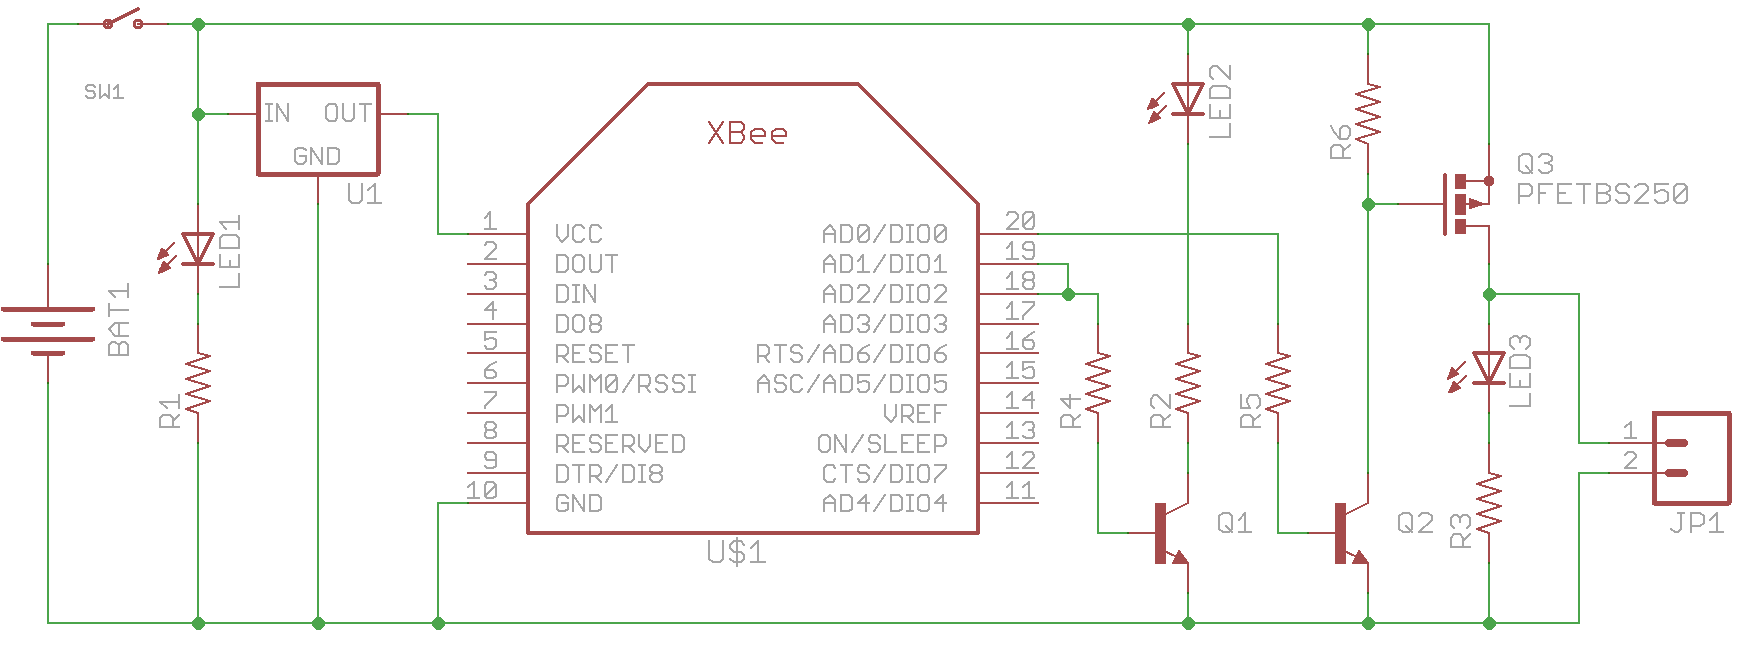
Launch System Base Unit Schematic
The base station is powered by a much beefier 3S lithium battery pack (11.1V, 2600mAh), due to the large amount of power required to set off an igniter. It also has an Xbee, which receives line passing signals from the Xbee in the remote. When the trigger is activated, a p-channel mosfet is turned on to allow current to flow through the output (and to the igniter). Status LEDs indicate the state of the base unit. The circuit schematic above gives the full picture.
Igniters
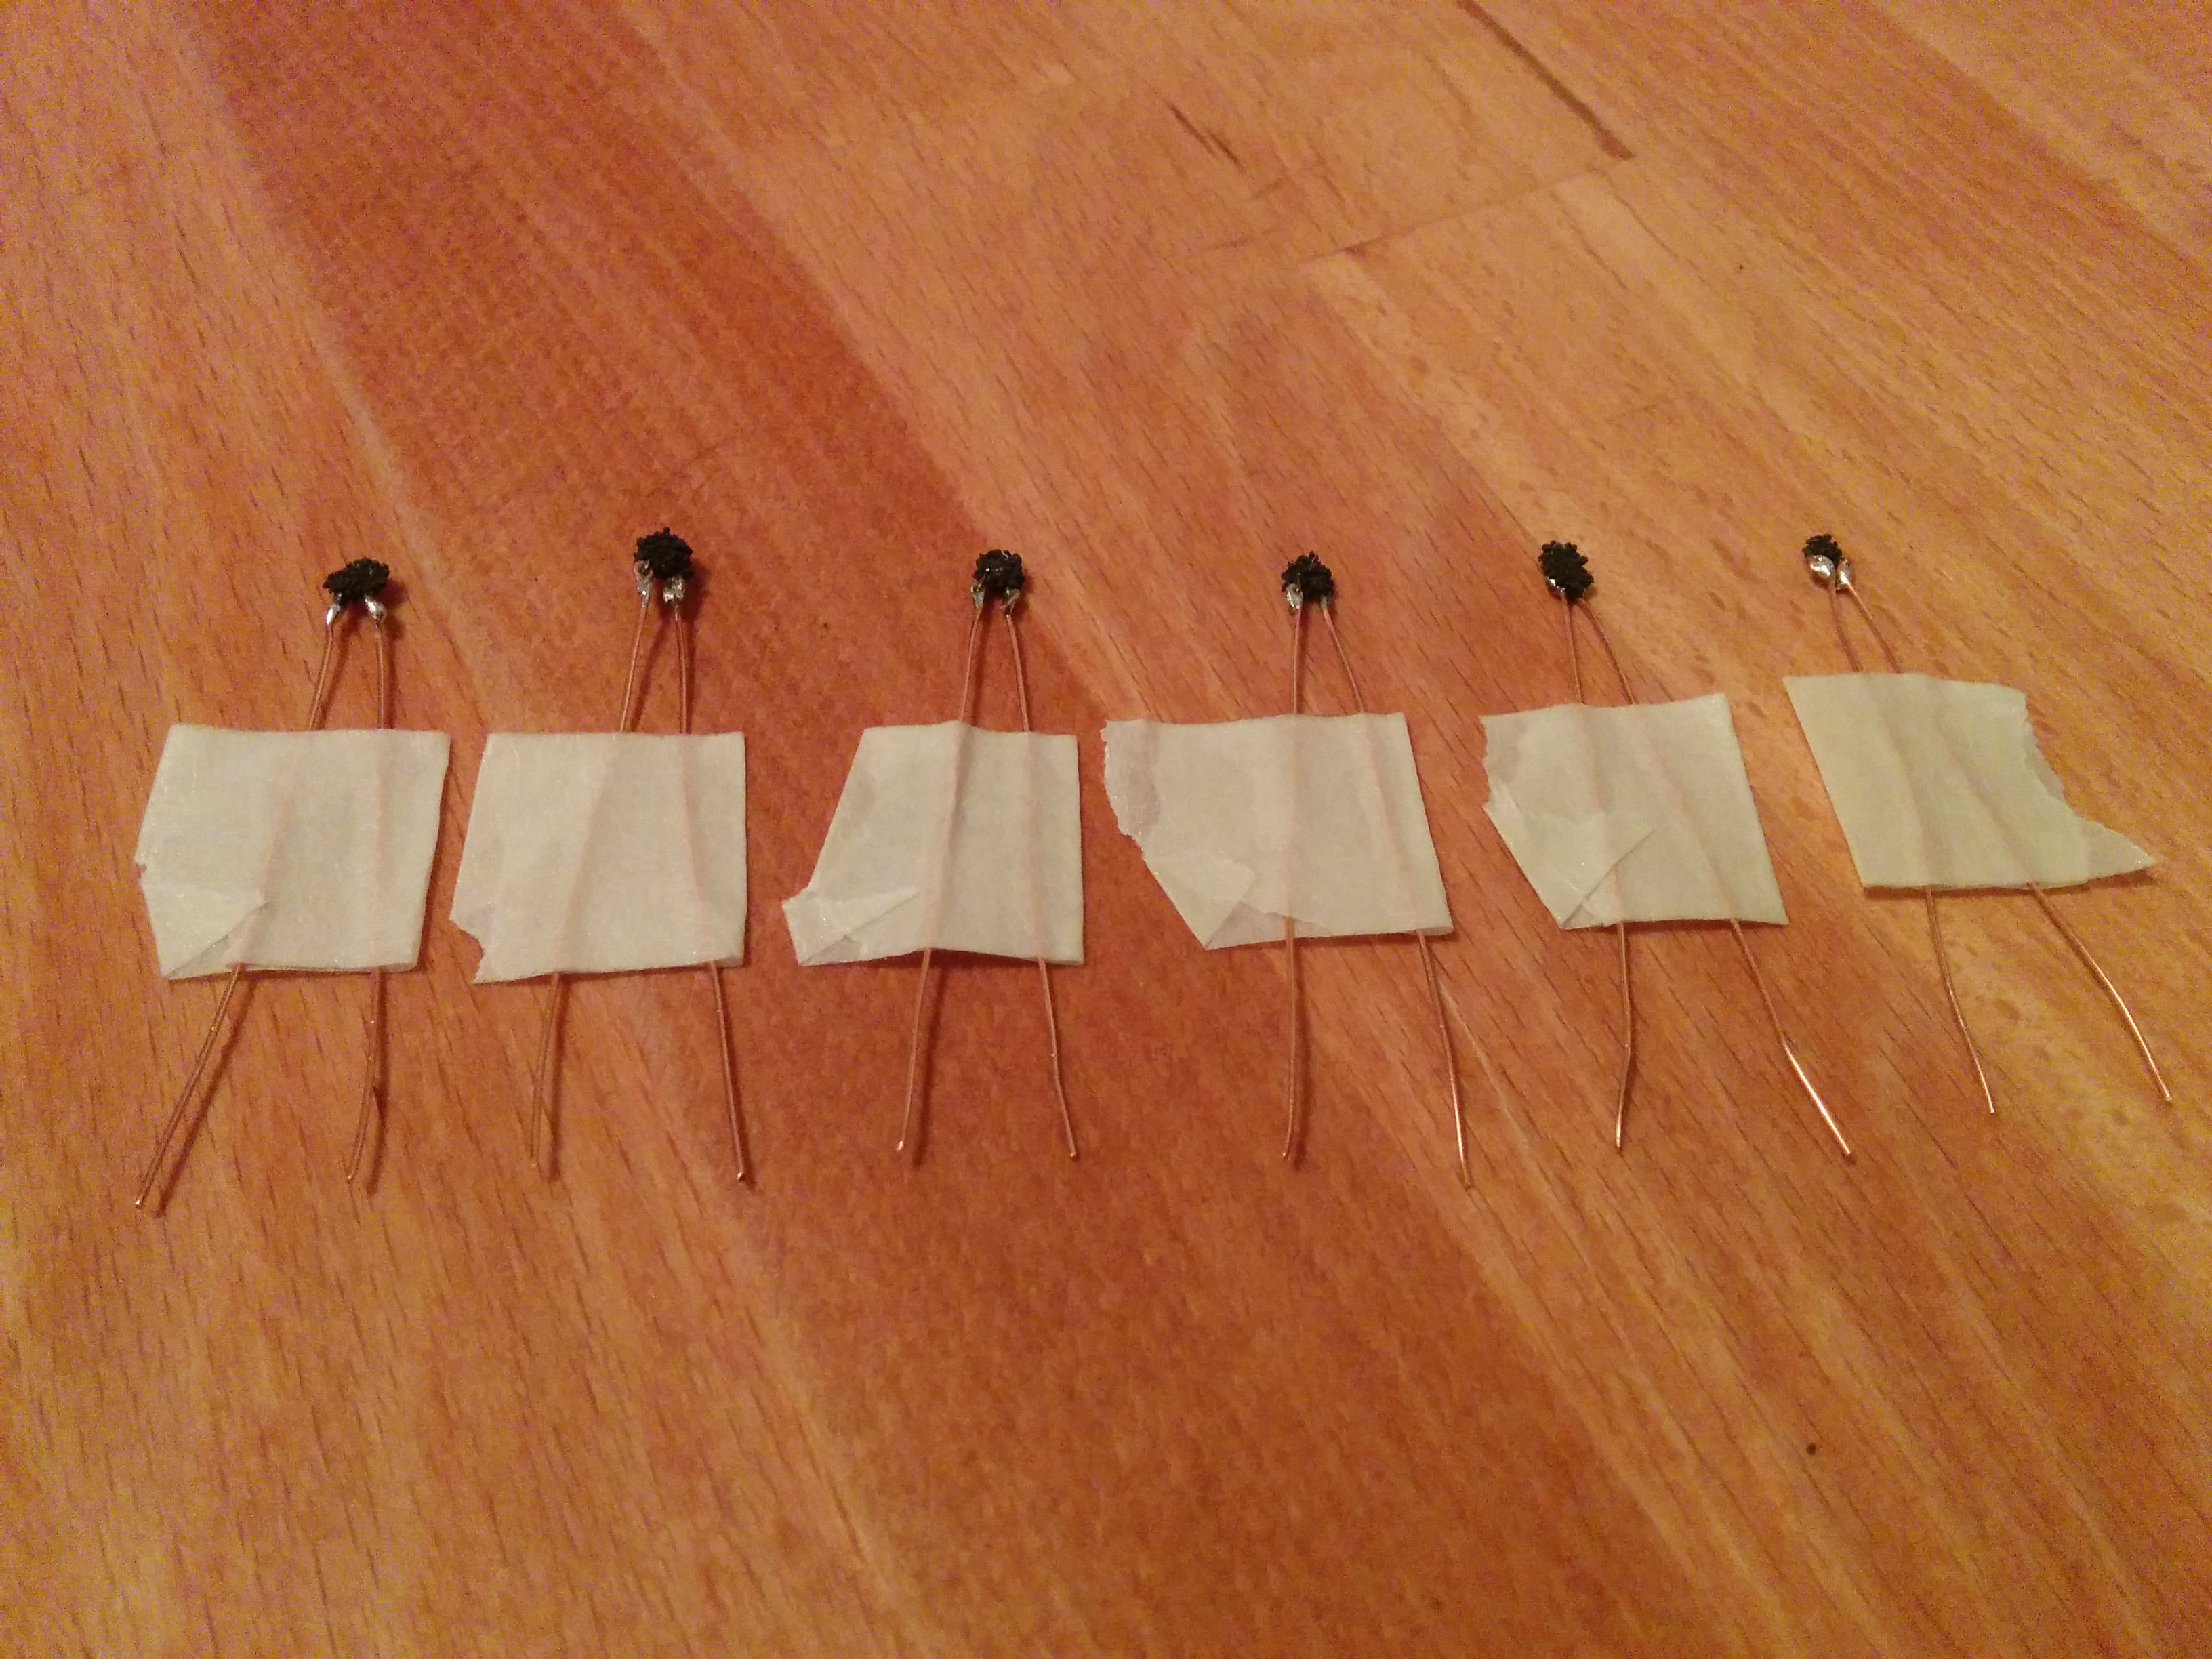
DIY Igniters
A DIY launch system isn’t complete without homemade igniters, so we acquired some nichrome wire and pyrodex (black powder substitute) to make our own. By twisting a bit of nichrome between two copper leads, and then dipping the tip in superglue before coating with a pinch of pyrodex, electric igniters can be made by the dozens for just pennies.
Launch Video
Coming Soon!
Check back for updates as we continue to progress with this project. Plans for the future include DIY fuel, GPS tracking/telematics with a custom rocket controller, and thrust vectoring.
Matthew is a computer engineer who enjoys designing hardware for embedded control systems. His hobbies include photography, gardening, coffee, and anything DIY.
[…] DIY 3D-Printed Model Rocket […]