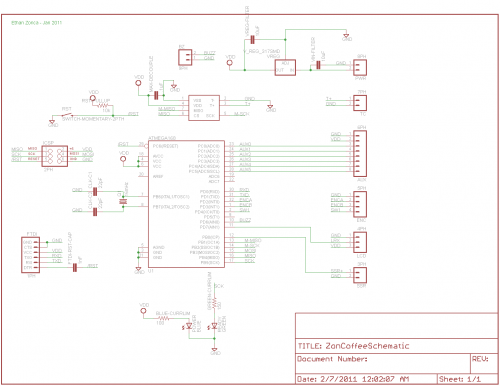
The Eagle schematic for ZonCoffee is included after the break. Note that this schematic still has a few quirks, but it should be accurate to the best of my knowledge. I will post the Eagle project once the design is finalized.
Prototype using a standard Arduino
- Piezo Buzzer (optional)
- Solid-State Relay- cheap on ($6, ebay)
- Rotary Encoder with Pushbotton (~$1.50, mouser)
- MAX6675- (free sample, maxim. This is an SO package, soldering will be tough)
- Thermocouple – ($3, ebay)
- Serial LCD – ($25, sparkfun)
- Screw Shield – ($14, sparkfun). Optional, but this will make your life much easier.
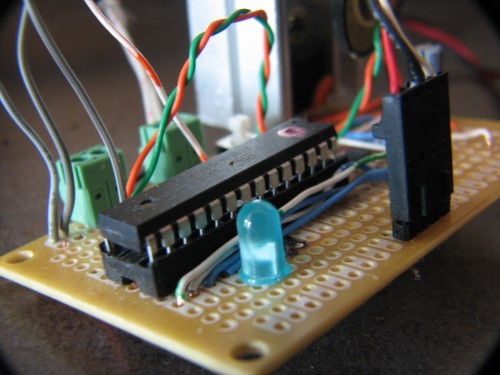
Permanent project without Arduino
- Arduino Permanent Install Project ($2, mouser)
- Mega328 with bootloader ($5.50, sparkfun)
- Rotary Encoder with Pushbotton (~$1.50, mouser)
- Solid-state relay – cheap on ebay ($6)
- Thermocouple – cheap on ebay ($3)
- MAX6675 – free sample (note that it is SOIC)
- You will need an Arduino or FTDI cable to program your ATMega328
- Additional components may be needed that are not listed here, such as screw terminals for wires, perf board, etc. Be creative.
I’m looking at ways to make this project cheaper, and I think I will add support for additional display types to the ZonCoffee sketch. A cheap 4-digit LED display could be used, and would be much cheaper than the $25 sparkfun display (although more of a hassle to wire, and less flexible with data displayed).
Drop a comment if you have any questions, recommendations, or if you know any sources for cheaper parts!


Ooh neat, I’ve been wanting to make some improvements to the factory configuration of my Mr Coffee ECMP50 (which is a totally different beast) and it’s interesting to look at what other people are doing with turning cheap pump espresso machine lead into espresso gold. Since I don’t do Arduino I can only give you some general cost-cutting tips…
1. HD44780-compatible parallel LCDs are available just about everywhere, starting at about $7/1 for a 16×2 character module and possibly cheaper if you can find them surplus. These require 6 or 7 GPIOs for control in 4-bit mode. See the LCD4BitLibrary for Processing code.
2. As long as you have a free analog input, you could save some money and hassle by using a $1-$2 thermistor as a temperature sensor. Some are rated up to 150°C, which ought to be plenty for a boiler. You can use the Thermistor4 component library to convert from raw ADC values to temperature with a tunable tradeoff for accuracy vs. calculation cycles. Pluses: the voltage swing is as wide as you like, you don’t have to worry about acquiring or dealing with an external SOIC if you don’t want to. Minuses: uncalibrated thermistors aren’t terribly accurate, can be slow to arrive at their final reading (some have a thermal time constant of 7s or more) which could require multiple derivative terms and/or feed-forward in your controller.
3. Consider using a $0.25 ceramic resonator instead of a $.50 quartz crystal and caps. Frequency accuracy is not terribly important in an application like this so a few percent either way won’t hurt as long as it’s not jittery. Also, most or all ATmega and ATtiny devices currently in production have 1% calibrated internal oscillators, usable at the minor cost of adjusting your workflow a bit and using a separate programmer such as the Bus Pirate. But if you’re using the Bus Pirate, you don’t need the bootloader and therefore aren’t restricted so much in your chip choices.
Thanks for the suggestions! I’m thinking of making my software a bit more modular to allow for a HD44780 display in 4-bit mode connected to the 6 AUX pins on my schematic. I’m also thinking of having a jumper so the user can choose to between a thermocouple with the MAX6675 or a thermistor, which I’ll probably put on ADC6. These changes could really lower the overall cost, but still allow for flexibility.
The internal oscillator idea is interesting… I use a bus pirate with stk500 emulation for programming, so I could always set the fuses to use the internal osc. I’m not doing much in the way of critical timing in my code, so the accuracy shouldn’t make a difference. Looks like I would have to make some changes to my code and use a different bootloader, as the default Arduino environment and bootloader assume a 8mhz frequency.
I’m also working on getting a PCB routed for this project, I’ll post some updated info once I have the design finalized. If all goes well, I’ll probably post the board on BatchPCB marketplace and/or post the Eagle project here once I’ve gotten a couple of test boards fabbed.