|
|
(step 1)
|
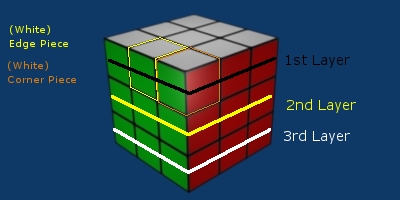
| There are 2 ways to get
get a white
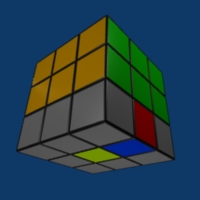
cross on the top of the cube. 1. Find a white edge piece in the third row with the white facing down, then just allign the side of the edge peice with the center of its color, and turn that face 180 degrees to bring it to the top of the cube. 2.Find a white edge piece in the third row with the white facing out, put it under the center it belongs to, then --D-R-iF-iR--> |
Before
you continue you should have this (only pay
attention to the colored cubies)  |
(Step 2)
|
|
| Find
a white corner piece in the 3rd row, and find out what corner it goes
to in the top layer, and
place that white corner piece directly under that top corner like ex1.
Then turn the face that the white sticker of the cubie is on so that
the white sticker is still in the third row, and then turn the bottom
to put the corner into place, and turn the face you turned just earlier
back the opposite way. |
|
 If white sticker is on left side of face: -iF-iD-F-- (here blue is face because thats what face white is on) |
 If white sticker is on right side of face: -F-D-iF--> (here red is face because thats what face white is on) |
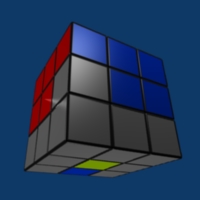
Before you continue you should have this (only
pay
attention to the colored cubies)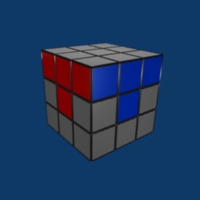  |
|
(step 3)
|
|
Find an edge piece on the bottom
without a yellow, and orient it so that whatever color is on the bottom
(on the face with the yellow center, colo ris called primary color)
determines what face is when you apply the algorithm. You put the edge
piece opposite the primary color.. If the color on the bttom is blue,
then you would orient
that edge so it is on the opposite side of the cube from the blue face,
and still in the third row. The color on this same piece that is in the
3rd layer of the cube will be called the secondary color, and you will
use that to determine what algorithm you use by looking at the color
that you put the edge piece opposite of, and seeing if the secondary
color is to the right or the left. |
|
  If the secondary color is on the left. (since blue is on bottom it becomes face, the color we look at when applying algorithms, and the edge piece is also oriented opposite that color) -iF-iD-F-D-L-D-iL--> |
  If secondary color is to the right. (since red is on the bottom it becomes face, the color we look at when applying algorithms, and the edge piece is also oriented opposite that color) -F-D-iF-iD-iR-iD-R-->
|
| Before you continue you should have this (only pay attention to the colored cubies) | |
(step 4)
|
||
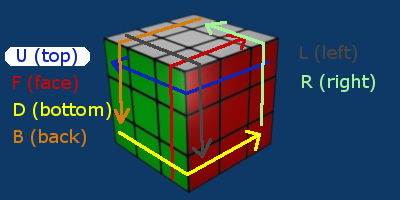
Orient
the cube so that the bottom becomes your face (this guide shows yellow
as face, and red as top). Then you apply the algorithm -U-L-F-iL-iF-iU
making sure to orient the cube like in the pictures below. ---> --->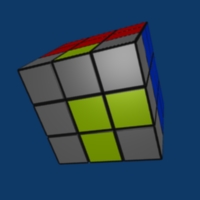 ---> ---> ---> ---> |
||
| Before
you continue you should have this (only pay
attention to the colored cubies) |
(step 5)
|
|
| When I say correcting the images I mean you need all the edge pieces so that they are touching their correct correct color at the same time, like you had to do with the top in step 1. Now in this step the yellow will still be considered the top, through the rest of the guide as well. | |
| Turn the yellow face until you have two
correct edges right next to each other and two incorrect edges right
next to each other....sorta like this--- --->  Orient the cube so that the two wrong colors are towards you and to your right (in this case green would become face, and orange would be right) and apply algorithm. -2L-2U-D-iR-L-2F-R-iL-iD-2L--> |
|
|
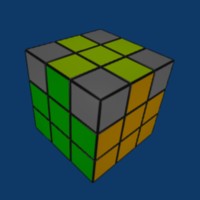
Before
you continue you should have this (only pay
attention to the colored cubies)

 |
|
(step 6)
|
| coming soon |
(step 7)
|
|
| coming soon | |