Quick Poll:
Is this page too text-heavy?
Want to learn how to solve the 3x3x3 rubik's cube? We have both videos
and text to show you how, quickly and easily! Grab your cube and start
solving.
For the technique in this tutorial, the cube is solved in layers,
the 1st layer, the 2nd layer, and then the 3rd layer.
Let's start out with some explanation:
-
If I say a certain color edge piece, that is telling you to find
an edge piece with one side of it white, which means it should have a
white sticker on it :-P.
-
If I say “cubie”, it means one of the 26 little
cubies that are either a corner, edge, or center peices which make up
the visible part of the cube.
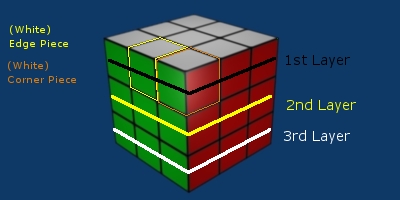
In the image (left) you see an example of
what I would call a white edge piece or white corner piece, they can
also be called other colors as well, and all you will need is one of
the edge or corner peices with that color on it. You will see I
categorized the cube into the 3 layers, which you will hear me refer to
through the tutorial.
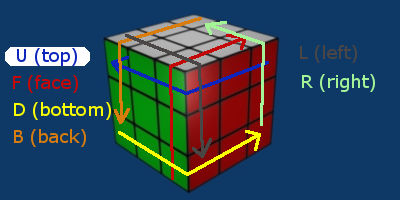
In the image (right) with the shorthand is based
on if your looking directly at the red face:
- a letter with an "i" before it means inverse, so counterclockwise
- -F--> means to turn the face clockwise 90 degrees
- -iF--> means to turn the face counterclockwise 90 degrees
- 2F means to turn the face 180 degrees.
1. Find a white edge piece in the third row with the white facing down,
then just allign the side of the edge peice with the center of its
color, and turn that face 180 degrees to bring it to the top of the
cube.
2.Find a white edge piece in the third row with the white facing out,
put it under the center it belongs to, then --D-R-iF-iR-->
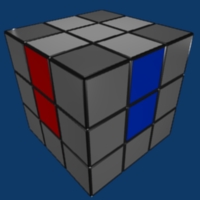
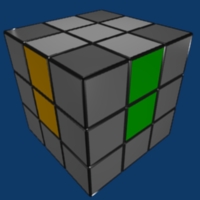
Before you continue you should have this (only pay
attention to the colored cubies)